---
title: "Microsoft SSO"
description: "Microsoft SSO To log in to the AppSec portal through your Microsoft identity platform, follow these steps: Navigate to your Microsoft Entra using the link…"
url: https://whitespots.io/docs/whitespots-wiki/appsec-portal/general-portal-settings/sso-settings/microsoft-sso
slug: whitespots-wiki/appsec-portal/general-portal-settings/sso-settings/microsoft-sso
publish_date: 2025-12-02T21:40:06.000Z
last_modified: 2025-12-02T21:40:06.000Z
---
# Microsoft SSO
# Microsoft SSO
{% hint style="warning" %}
The following steps describe the state of Microsoft services at the time of creating this instruction (16/01/2024).\
The Microsoft identity platform **interface may change**, so for the most up-to-date information, refer to the official [source](https://learn.microsoft.com/en-us/entra/identity-platform/scenario-web-app-call-api-overview) and their official [video guide](https://www.youtube.com/watch?v=LRoc-na27l0)
{% endhint %}
To log in to the AppSec portal through your Microsoft identity platform, follow these steps:
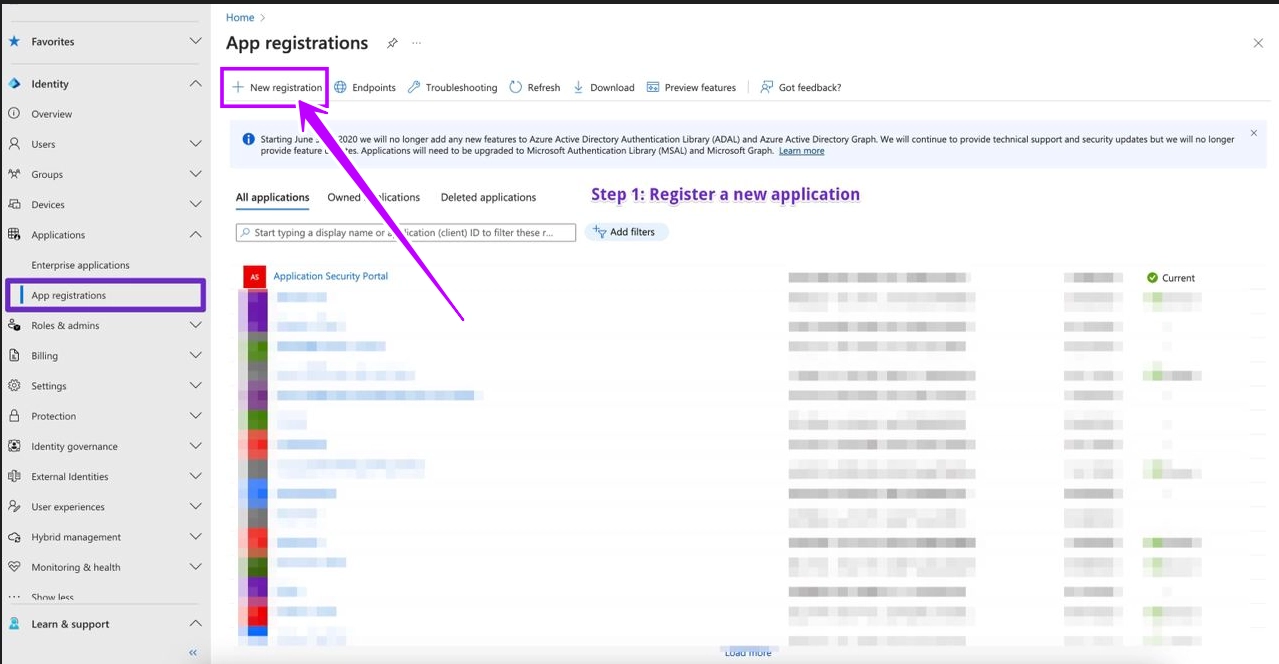
1. Navigate to your **Microsoft Entra** using the [link](https://entra.microsoft.com/#view/Microsoft_AAD_RegisteredApps/ApplicationsListBlade/quickStartType~/null/sourceType/Microsoft_AAD_IAM)
2. Navigate to **Application** -> **App registrations** section and **register a new** **application**
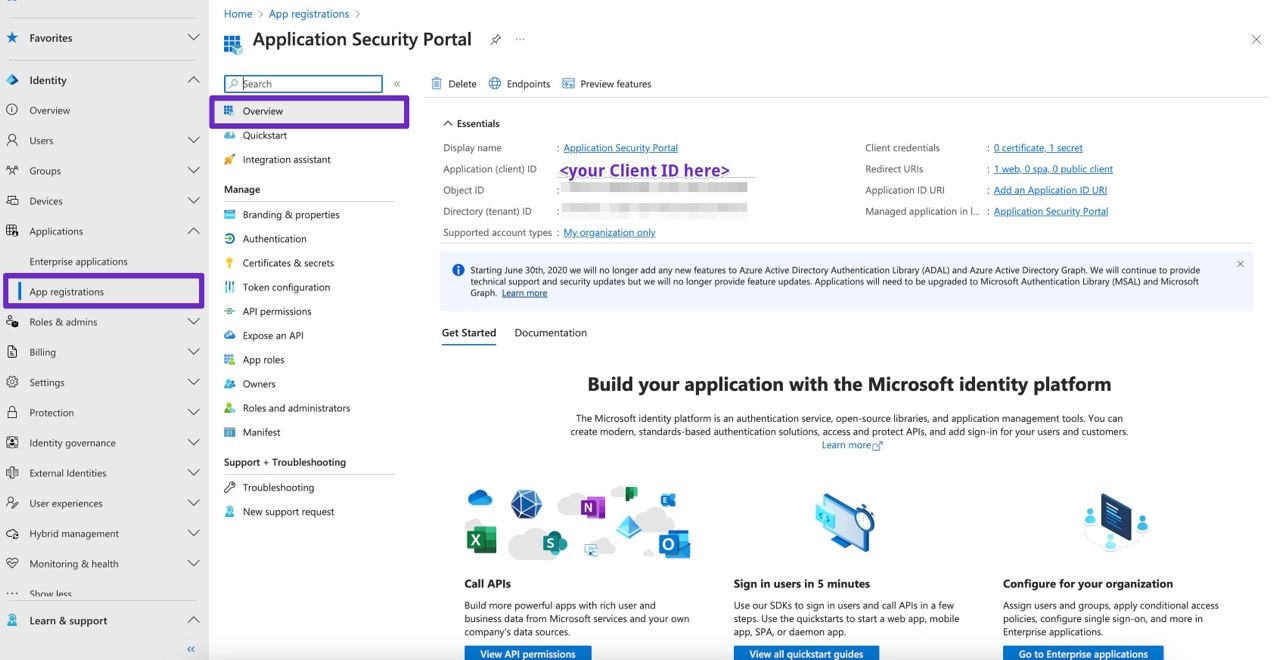
3. You will see the following screen, where you need to copy the \:
Client ID
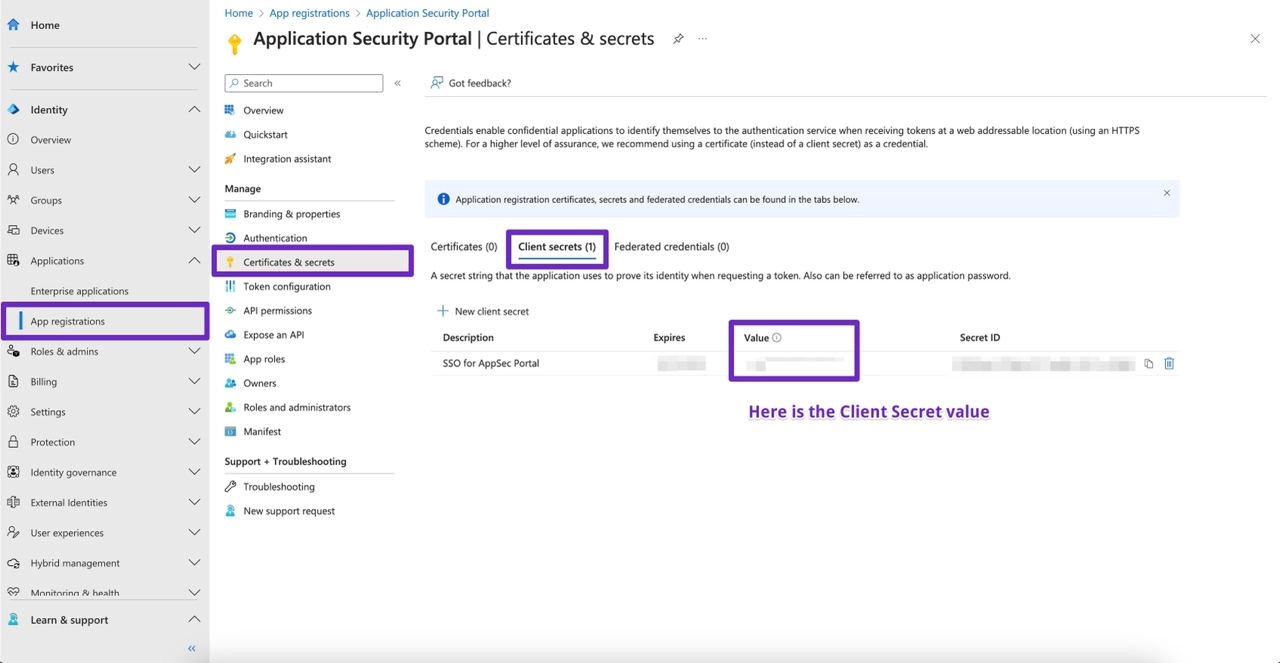
4. Now create a client secret on the "Certificates & secrets" tab:
Client Secret
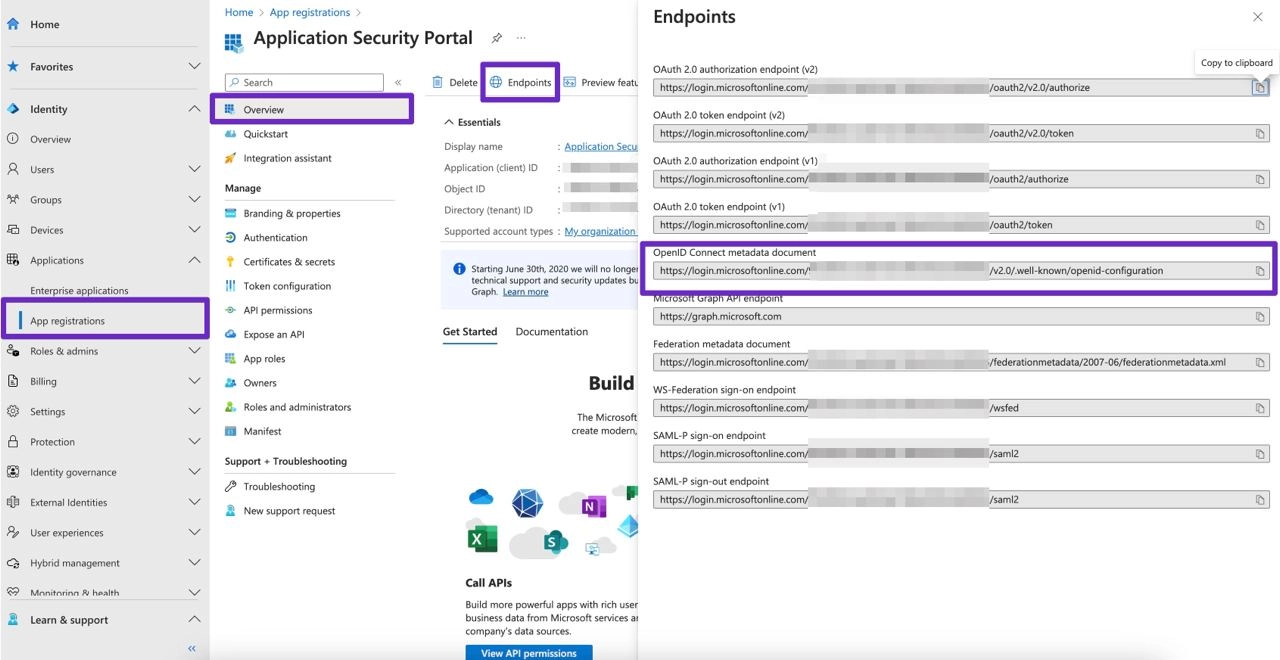
5. The final data you have to get here is the **server metadata url.**
Server metadata url
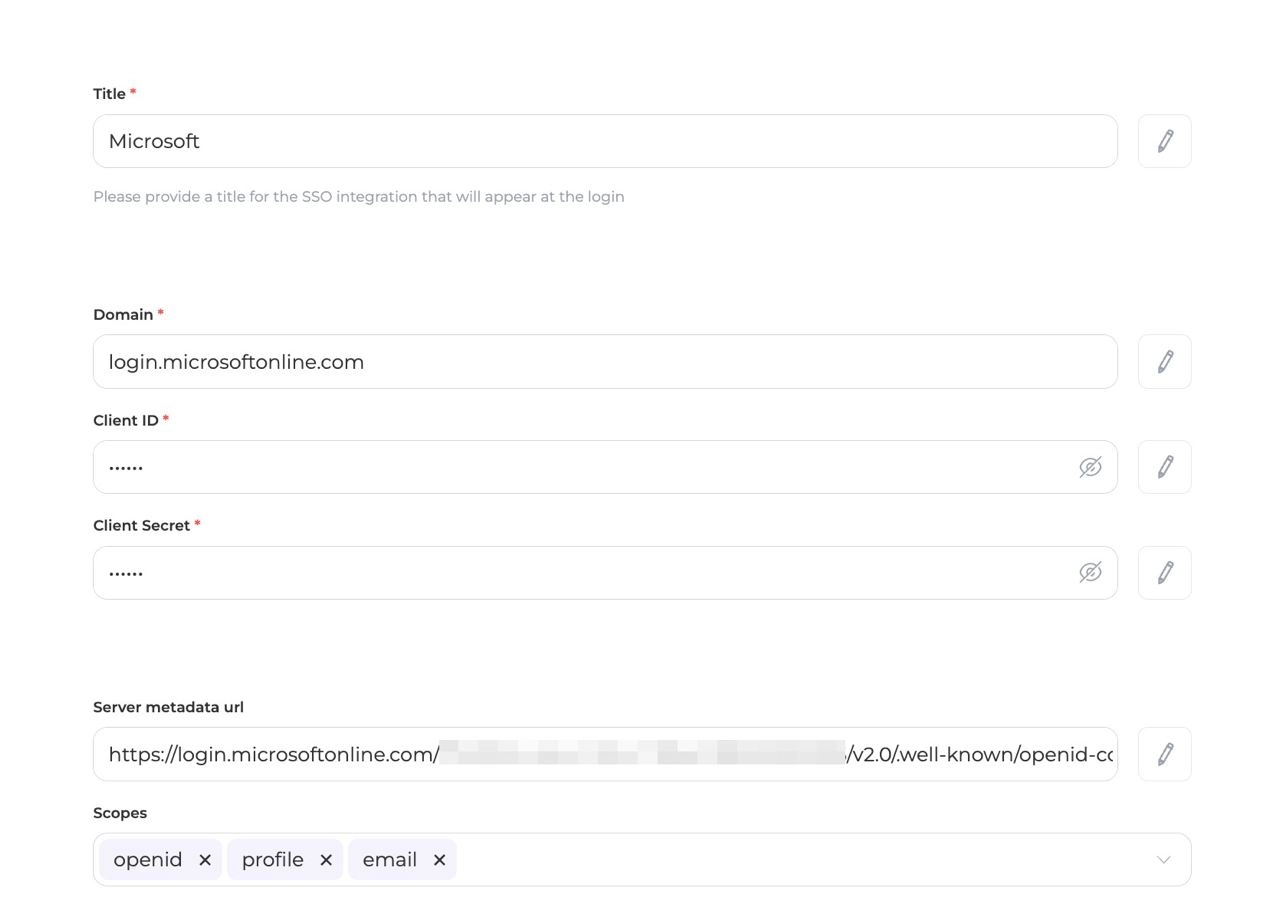
Use the data created for your application to [configure ](https://whitespots.io/docs/whitespots-wiki/appsec-portal/general-portal-settings/sso-settings)SSO integration in the AppSec portal:
* **Domain**: login.microsoftonline.com
* **Client ID**: \
* **Client Secret**: \
* **Server metadata url**: \
Microsoft SSO values example
### MS Role Mapping
To create a role mapping in our portal, follow these steps:
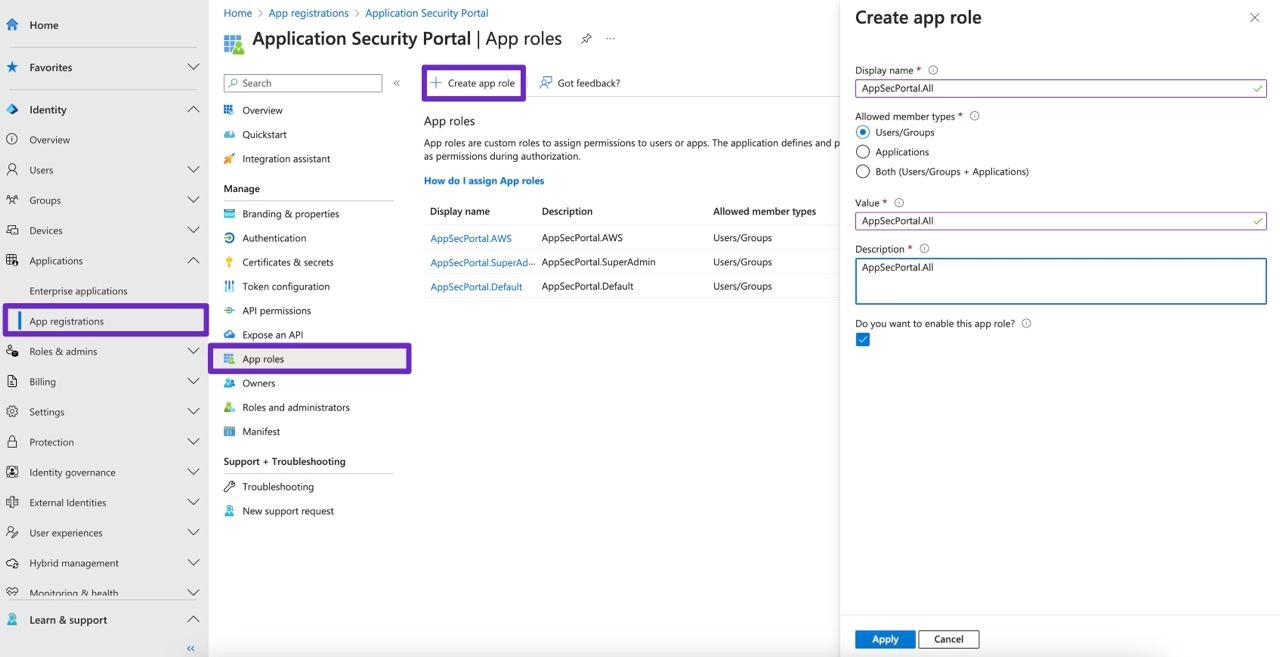
1. **Create custom roles for Application**
Navigate to **Applications** -> **App registrations** -> <_**Created application**_> -> **App roles** section and create all required roles here
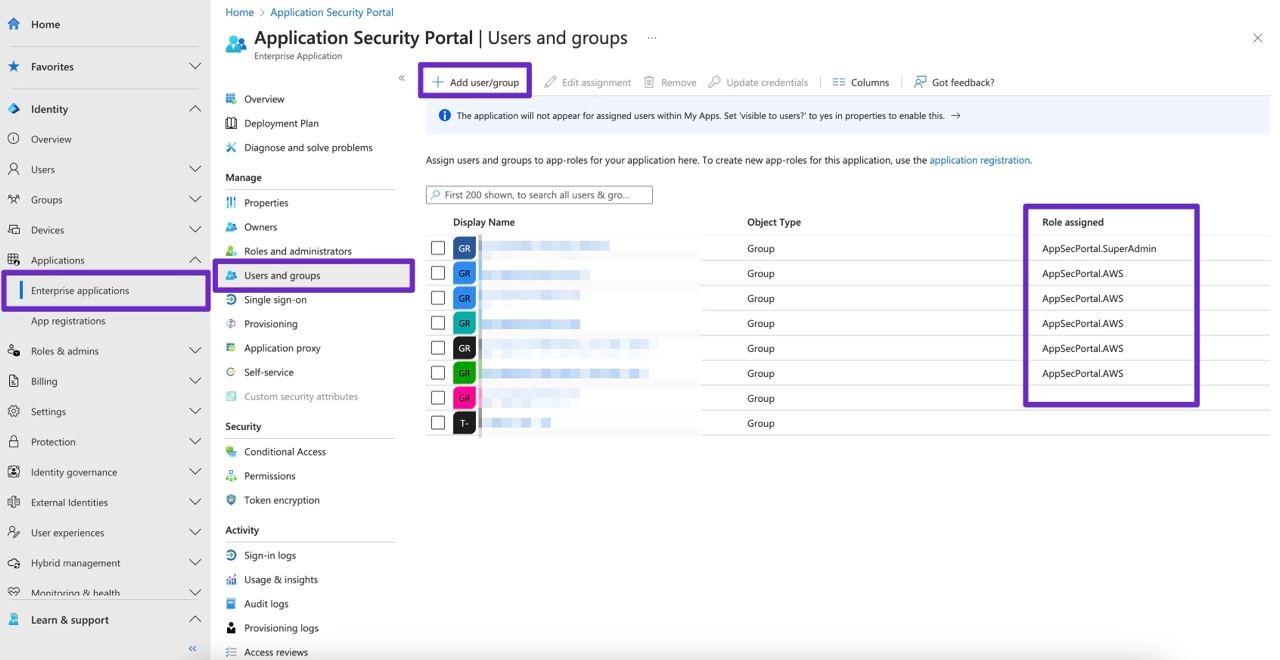
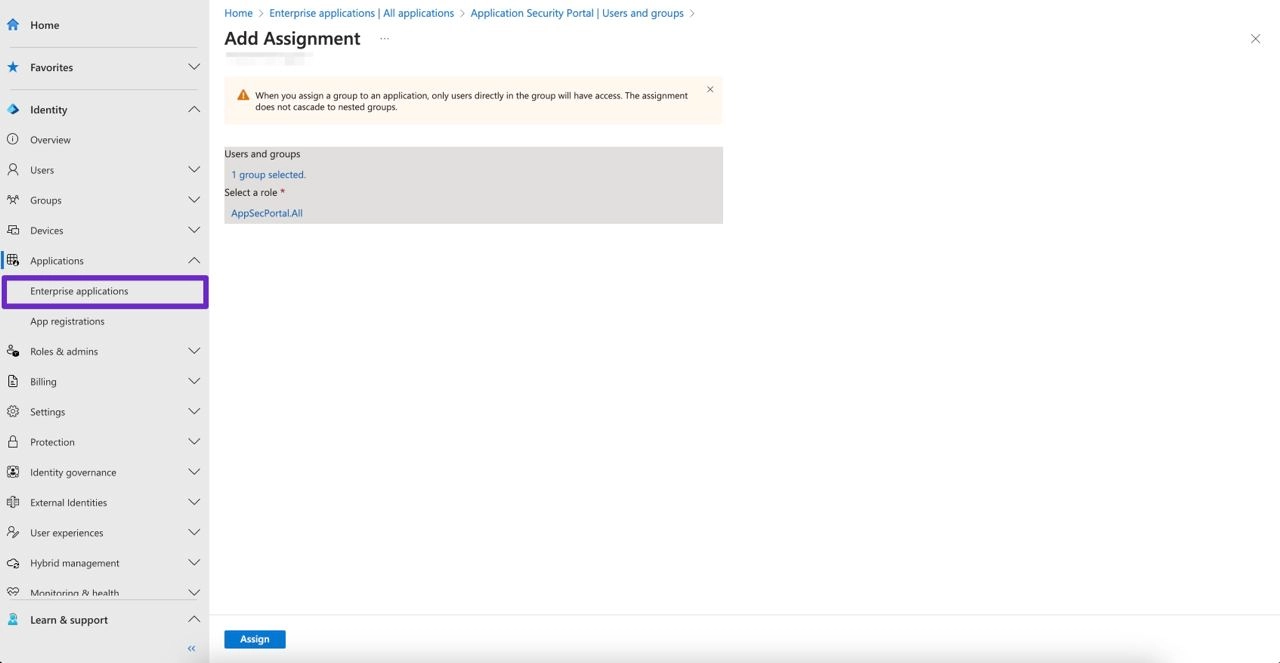
2. Now you will be able to assign users/groups to Application roles
For example select a group with all colleagues from IT department and assign them to our newly created role
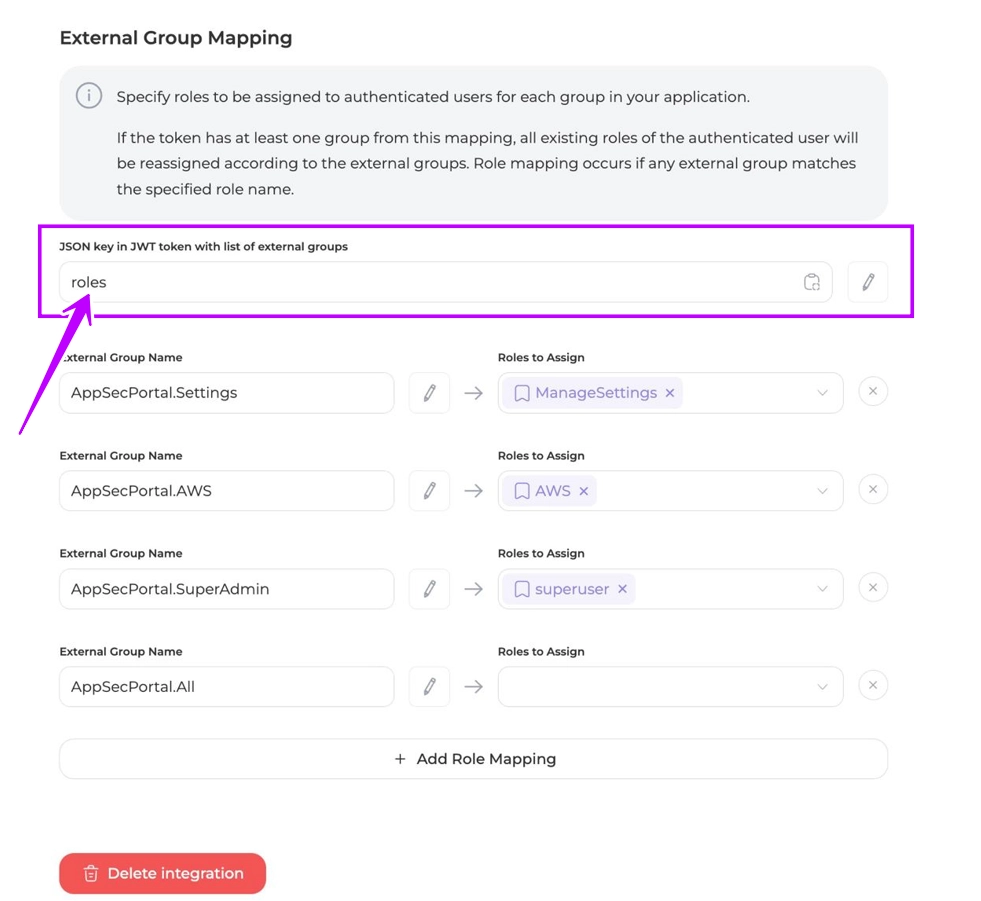
3. [Configure](https://whitespots.io/docs/whitespots-wiki/appsec-portal/general-portal-settings/sso-settings#role-mapping) the mapping of roles for your SSO connection. \
**JSON key in JWT token with list of external groups** field should equal to **roles** for this integration.
{% hint style="danger" %}
The integration only works with the **roles** value\
We know that Microsoft provides the guide with a clearly displayed "groups" key 🤷♂️ \
Get more information about this specific feature from the [video](https://youtu.be/LRoc-na27l0?si=VBqZ1hvDWjUSpKmr)
{% endhint %}
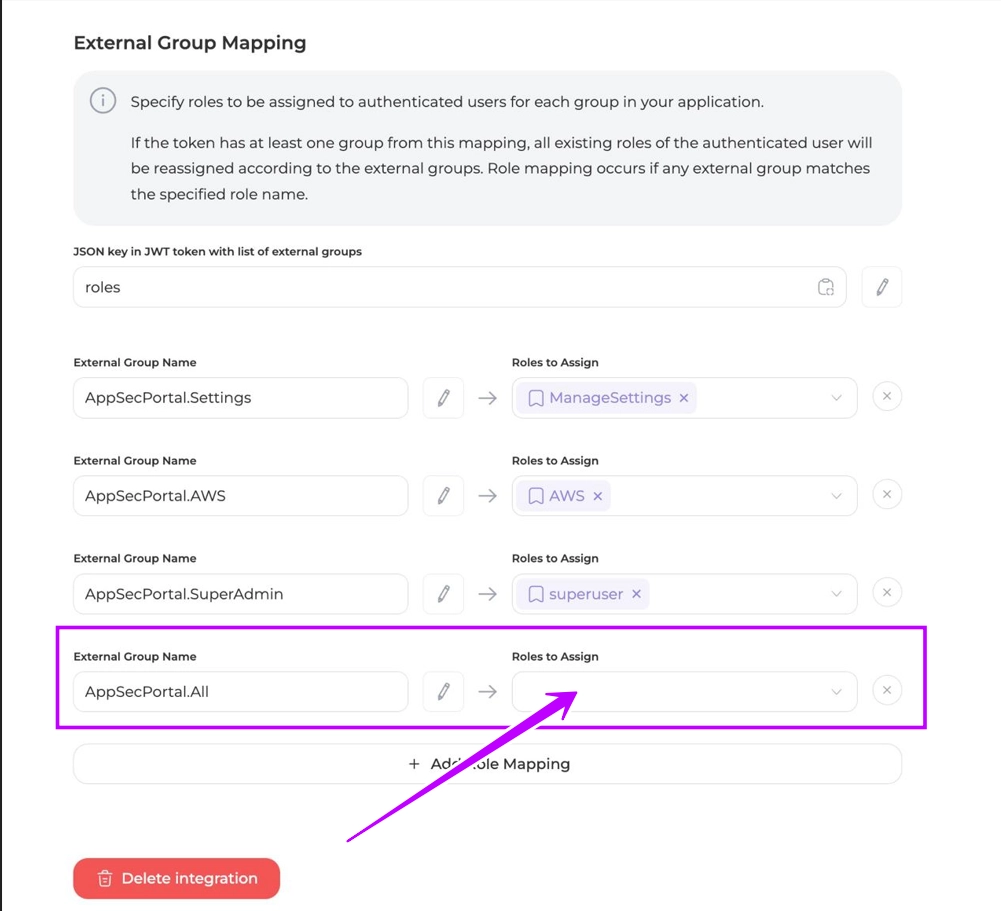
3. If a mapping has not been previously configured, the first time you log in using Single Sign-On (SSO), the SSO settings will display a list of roles received from Microsoft under the name **External Group Name**. You can configure these roles by creating mappings. To do this, add the corresponding portal roles for each group from this list.
If new roles appear on the Microsoft's side, they will also appear as unassociated during the first login and you should associate them later.
---
## Navigation
- Location: [Docs](https://whitespots.io/docs) > [Whitespots Wiki](https://whitespots.io/docs/whitespots-wiki) > [AppSec Portal](https://whitespots.io/docs/whitespots-wiki/appsec-portal) > [🛠️ General Portal settings](https://whitespots.io/docs/whitespots-wiki/appsec-portal/general-portal-settings) > [SSO settings](https://whitespots.io/docs/whitespots-wiki/appsec-portal/general-portal-settings/sso-settings)
- Previous: [GitLab SSO](https://whitespots.io/docs/whitespots-wiki/appsec-portal/general-portal-settings/sso-settings/gitlab-sso)
- Next: [Okta SSO](https://whitespots.io/docs/whitespots-wiki/appsec-portal/general-portal-settings/sso-settings/okta-sso)